overview
Welcome back to our Oyaki experiment! Last time we talked about how we had discovered the discrepancy between Japanese All Purpose (AP) flour, called chuurikiko, and American AP flour. The American King Arthur AP flour we used has a higher protein content of 11.7% compared to the 9% typical of Japanese AP flour. In our last attempt, because we couldn’t get our hands on any Pastry flour (which sits at 9% protein) we tested American AP flour vs. American Cake flour (7-9%). Our favorite was the AP flour, however it was denser and drier than the model oyaki we were looking for.
If you’re wondering why the amount of protein in the flour matters, the simplest way to look at it is that the protein is what will create gluten or structure: higher amounts of protein means lots of gluten or stronger bread. More gluten means more stretch and elasticity, which creates chew. The typical spread of protein in flours goes like this: Bread flour (11-14%), AP (9-11%), Cake (9%), Pastry (8%). You might notice: Less protein flours are good for more tender, crumbly, or flaky textures.
Hence today’s experiment: mixing AP flour with Cake flour to create our own “Pastry” flour or the flour that will match the Japanese AP flour. We’ll fill it again with some leftover ground beef burger mix and also red bean paste – although this time, we’ll have freshly made red bean paste, both chunky and smooth, check out the recipe for that here. Ok, let’s make some oyaki!
Carlienne’s Oyaki Experiment Test 3
Materials
- Bowl Scraper
- Mixing Bowl
- Non-stick Pan for cooking filling, if needed
- Chopsticks/Whisk
Ingredients
- 100g All Purpose Flour (11.7% protein content)
- 100g Cake Flour (8% protein content)
- Healthy Pinch of Kosher Salt
- 150 mL Water + 1/8 C Water
- 1 Tbsp Sesame oil
- Filling: leftovers, certain meats, or red bean paste
- 4 Tbsp Vegetable Oil for an easier filling process
How to Make Oyaki Guide
- Mix both flours and salt in a bowl. We prefer using chopsticks instead of whisks as it’s easier to clean and less waste.
- Combine sesame oil and water and then pour into your dry ingredients in 3 phases, mixing in between (adding water incrementally just makes it easier to combine).
- When everything is combined and the dough starts to take shape, use your hands to give it a small knead and fold into a smooth ball.
- Pro Tip: if the dough is still too wet or you have lots of dough stuck to your hands, sprinkle some more flour to rub the wet dough off.
- Let it rest in the bowl covered for at least 30 minutes. This allows the dough to become more elastic, which also makes it easier work with when filling.
- Take this time to cook or prepare your fillings. Depending on the filling, for example red bean paste, you can pre-scoop your filling and refrigerate it for 10-15 minutes to set and make it easier to handle while filling.
- When your dough is done resting, take it out on a flour dusted work table and roll into a log about 12 inches long.
- Cut into 6 pieces and shape pieces into small dough balls.
- Coat cooking pan with some oil as oyaki will go straight into the pan after filling, then coat the insides of your hands lightly in oil so the dough doesn’t stick while working with it.
- Flatten a dough ball in your palm and take a spoonful or two of your filling to the center of the flattened dough. You can be fairly generous with the filling since this dough will stretch a bit.
- Create a C shape with the opposite hand and scoop up the dough, lifting up the edges of the dough with your C shape and allowing the center to droop down between your fingers.
- Let gravity do most of the work and simply guide the dough up and over your filling until you can pinch the edges closed.
- Once sealed, gently flatten and place on your oiled pan and continue to fill and shape the others.
- Pro Tip: if you’re using multiple fillings, you can use sesame seeds or spices sprinkled on top to differentiate the oyaki.
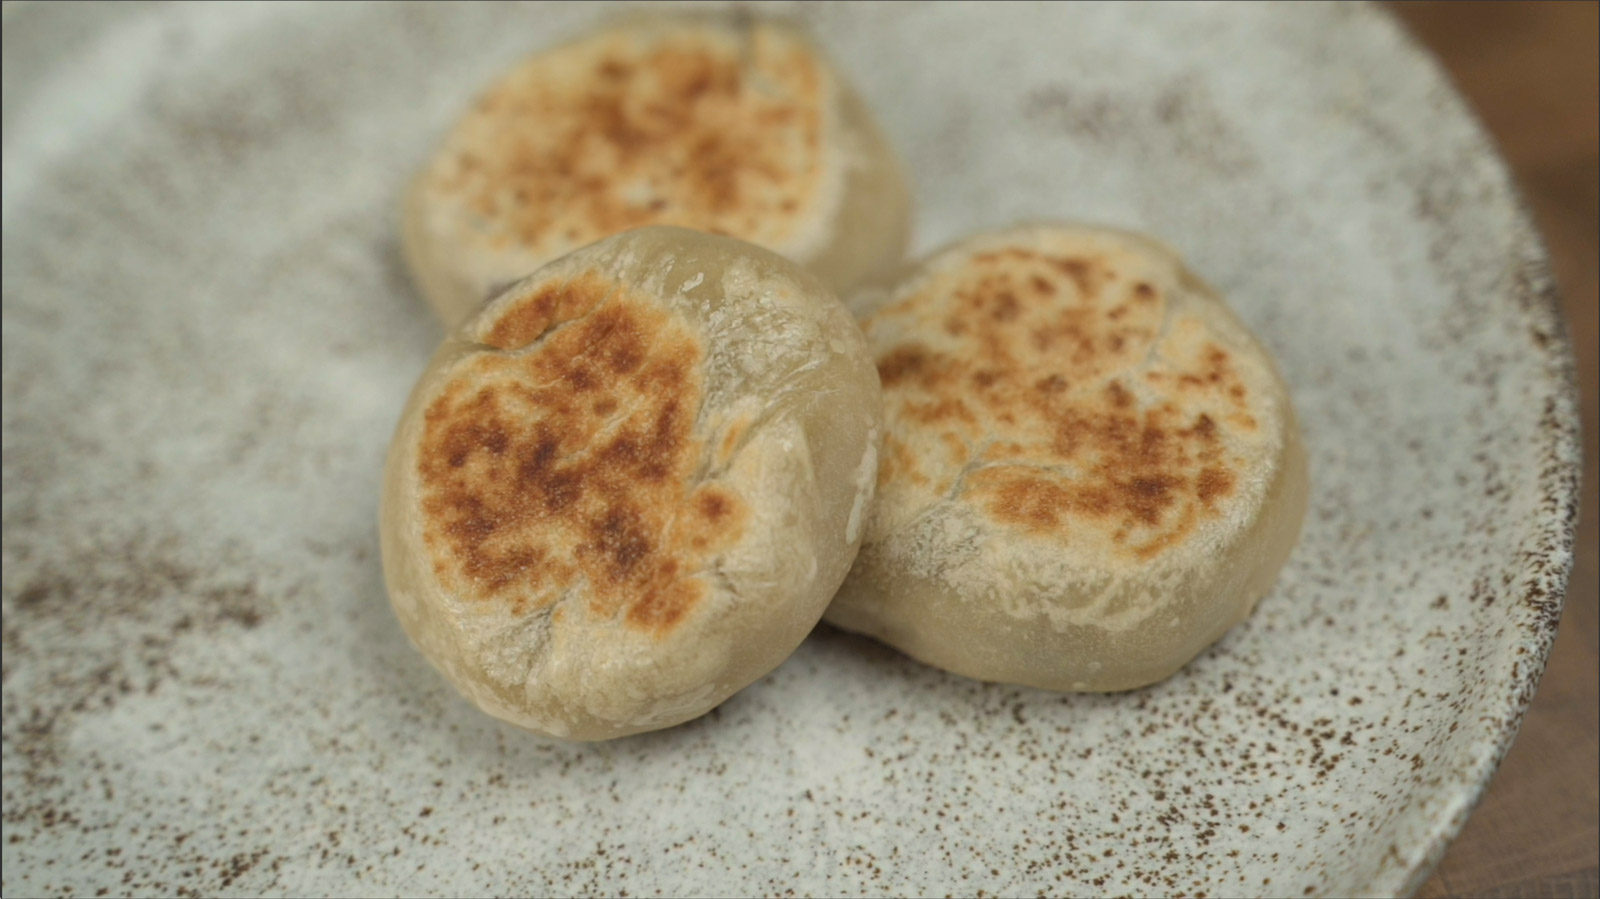
- When your pan is filled, put it on a medium heat, covered. Flip when the undersides are golden brown. On the second side, add 1/8 cup water to the pan to steam the oyaki, which creates more of a fluffy bread-y texture. This is also helpful for cooking through oyaki that has thicker skins/dough. Once the water has evaporated and both sides are browned, you’re done.
- Let cool until you can touch and enjoy!
For a step by step with photos, see our previous oyaki experiment, which uses the same method: Oyaki Experiment (Part 1)
Final Thoughts on Test 3
In our first experiment comparing pure AP vs. pure Cake flour, we preferred the texture of the pure AP flour oyaki but it lacked the fluffy “break” we saw when watching other recipe videos online. This 50/50 mix got us closer to the protein content of the Japanese AP flour and overall was a tasty treat. However, it still did not have the right break we were hoping for so we’re going to try a different ratio of flour to water and also test kneading and/or resting the dough longer to see if that will give us a better texture.

Tools Used To Make This Dish*
- Duxtop Portable Induction Cooktop
- Cutting Board: Boos Block Edge Grain
- Cuisinart Stainless Steel Pans
- Half Size Hotel Pan
Camera Gear List*
- Sony A7III
- Sony A7rIII
- Sony SEL2470GM Lens
- Sony SEL90M28G FE 90mm f/2.8-22
- Deity V-Mic D3
- Audio-Technica AT4040 Cardioid Condenser Microphone
- Blue Compass Premium Tube-Style Broadcast Boom Arm
- Sirui ET Series Tripod
- White Balance Card
*I am a participant in the Amazon Services LLC Associates Program, an affiliate advertising program designed to provide a means for us to earn fees by linking to to Amazon.com and affiliated sites.