overview
Welcome back to our Mochi Making Journey! This time, we are testing a new method and 2 different ratios for making mochi. Instead of steaming the mochi dough, we are going to cook it directly on the stove, based off Leo’s Japanese Dojo Recipe (via Youtube) and Chef Tomoko Kato’s Recipe (via NYT) recipes. You might notice that Leo’s recipe calls for pretty much the same ratio as Namiko Chen’s recipe from Part 1 of our journey. Chef Tomoko’s ratios are quite a bit different with equal parts flour and sugar (versus the half amount of sugar to flour in the other two recipes) and almost twice the amount of water. Let’s see how this cooking method and varying ratios affect our mochi!
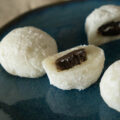
Homemade Daifuku (Red Bean) Mochi Recipes
From Leo’s Japanese Dojo Recipe (via Youtube) & Chef Tomoko Kato’s Recipe (via NYT)
Materials
- Medium pan
- Spatula
- Bench Scraper (optional)
- Cupcake liners (optional)
Ingredients
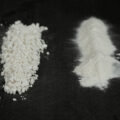
- potato starch/cornstarch/arrowroot powder
- red bean paste
Leo’s Japanese Dojo Recipe
- 4 oz Sweet/Glutinous Rice Flour* (115 g)
- 2 oz Sugar (59 g)
- 6 oz Water (180 mL)
Chef Tomoko Kato’s Recipe
- 150 g Sweet/Glutinous Rice Flour*
- 150 g Sugar
- 300 mL Water
*Note that we are currently using mochiko rice flour. See Thoughts below for more info.
How to Make Daifuku Mochi
Prefer pictures? Check out our Step by Step with Photos below.
- Combine flour and sugar in your pan.
- Add your water, mix well, then let this sit.
- Prep your red bean paste filling by pre-scooping or shaping into balls and then set in the refrigerator to firm up. This will make the filling easier to handle and wrap later.
- Prep your work station by dusting with starch.
- Return to your pan and turn on heat to Medium to cook mochi dough, stirring continuously.
- Reduce the heat to Low when the mochi begins to come together and keep stirring.
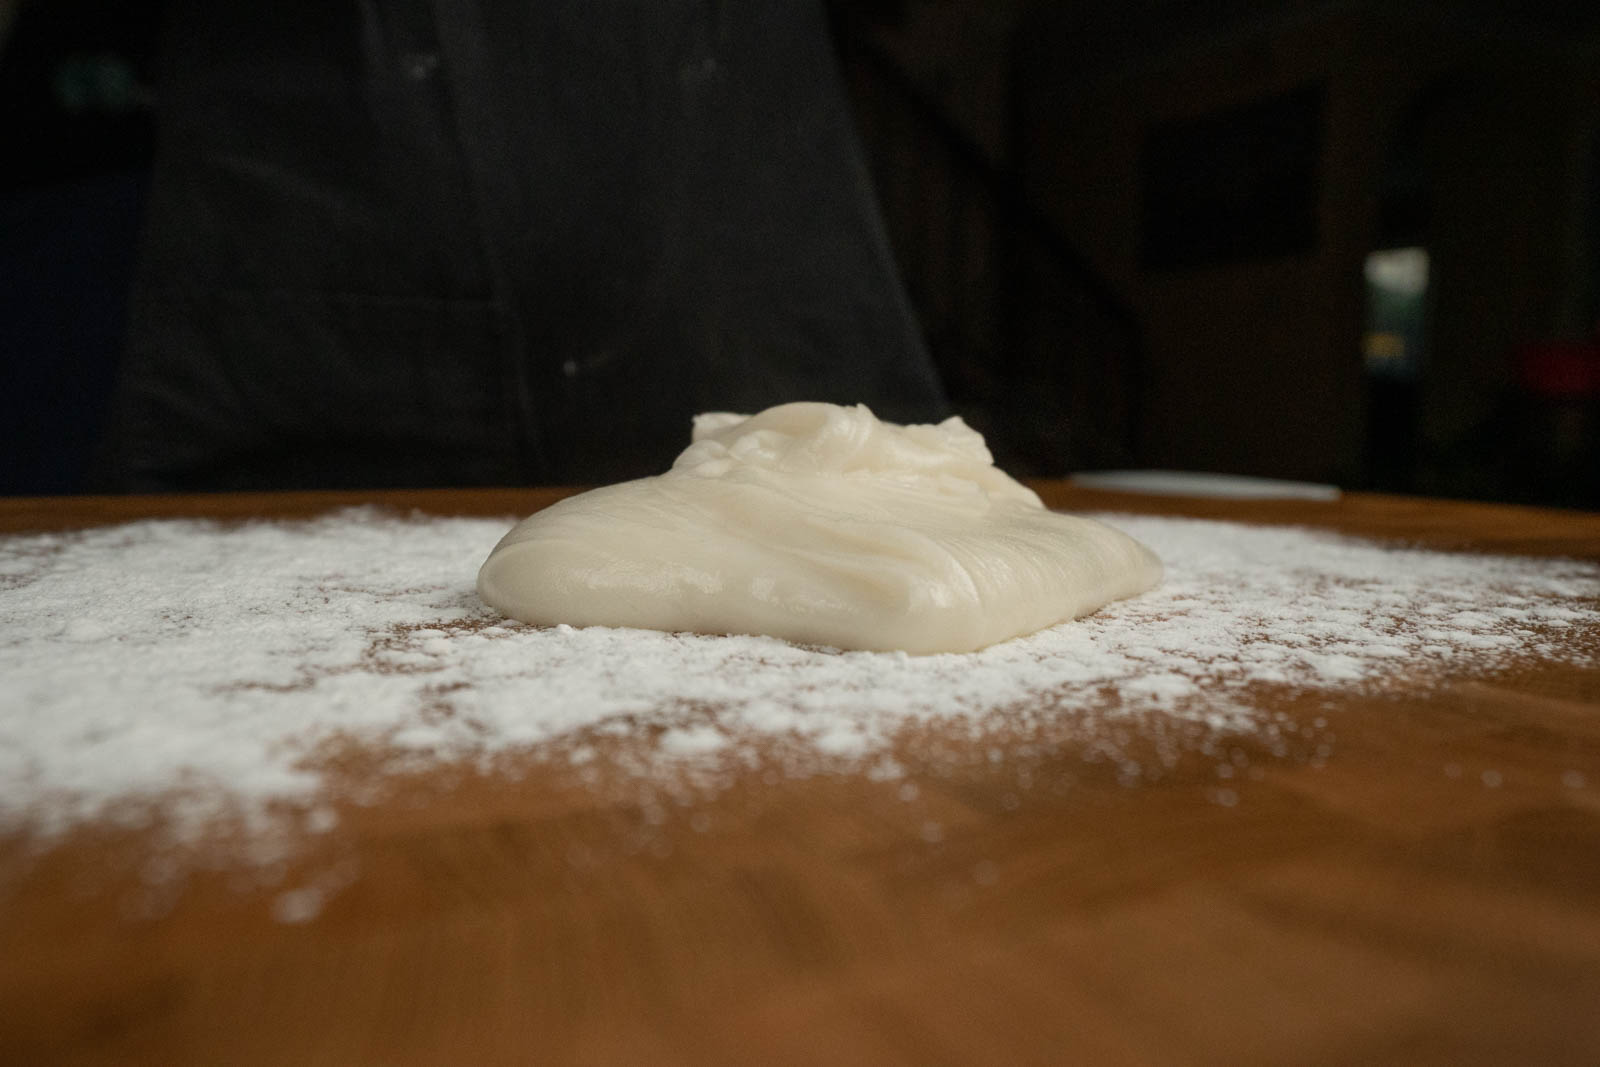
- Cook and stir until the color changes from matte to shiny and almost translucent when stretched. Texture-wise, the dough should start to come together and will drip in thick ribbons like caramel or taffy: then your mochi is ready.
- Pour mochi dough onto your dusted work surface. Allow a few minutes for the dough to cool enough to handle, but don’t wait too long.
- Be careful when working with mochi while it’s still hot. You can use a dough scraper to fold the mochi to minimize touching it with your hands. Fold the mochi into something like a log. As you fold the mochi over, you’ll automatically incorporate some of the starch from the surface, so you don’t need to add additional starch on top.
- Portion mochi dough into 6-10 pieces, depending on your size preference. With Leo’s recipe we preferred 8 pieces. Tomoko’s recipe makes quite a bit more dough.
- Gently flatten mochi piece in your hands and remove any excess starch.
- Use a pastry brush or gently slap the mochi piece back and forth between your hands to shake off extra starch.
- Place a red bean ball in the center. There are many ways to seal the mochi. The easiest is simply pinching opposite sides of the wrapper together up and over the red bean filling. If you’re familiar with dumpling making, you can fold the edges together while gently tugging the dough up and around the red bean. This may result in a more evenly distributed and prettier mochi, but otherwise how you fold it won’t affect the taste.
- Once sealed, turn mochi over, sealed side facing down. Gently reshape mochi as needed.
- Use cupcake liners to keep your mochi separate and keep them in sealed to avoid drying out. Fresh mochi will last only a couple days. Keep in the refrigerator if it’s especially warm.

Thoughts on Mochi Making Part 2
Both recipes resulted in super soft mochi, but no chew or elasticity. We had a slight preference to the texture that resulted from Leo and Namiko’s ratio, but it also could have been that we did not cook Chef Tomoko’s mochi dough enough the first time around. The New York Times article stated that she cooked it for about 5 minutes and even Leo says it takes only a few minutes to cook. Most mochi recipes mention a change in color “from white to almost translucent” or shiny. Sometimes it’s pretty hard to see the change, so another helpful gauge is when the dough starts to come together or holds its shape.
Just for kicks, we also tested cooking the dough (Tomoko’s recipe) for more than 15 minutes. The dough was much easier to work with too and did not stick to our fingers. We found that the dough did get a little more bite, but not necessarily any chew.
We also preferred this method of cooking mochi dough on direct heat: you get better control and precision since you can see the mochi coming together, while the steaming method is a bit of guessing and checking. I also preferred the working with the mochi while still warm and soft, as opposed to chilling it in the refrigerator to set.
Sadly though, we’re still not able to achieve the chew that we want from these mochi recipes. Upon further research, we learned that despite most recipes listing mochiko and shiratamako as interchangeable rice flours, there is a significant difference in the results. Mochiko flour is finer while shiratamako is coarser and should create more chew. However, shiratamako flour is not readily available except at Japanese markets (and rather expensively online), so we’re going to do some hunting and test shiratamako flour next!
Check out Part 3 of our Mochi Making Journey here!
Step by Step with Photos


Tools Used To Make This Dish*
You can support our creations at no additional cost to you by using our affiliate links below. Much love!
- Duxtop Portable Induction Cooktop
- Cuisinart Stainless Steel Pans
- Spatula
- Cupcake Liners
- Bench Scrapers
Camera Gear List*
- Sony A7III
- Sony A7rIII
- Sony SEL2470GM Lens
- Sony SEL90M28G FE 90mm f/2.8-22
- Deity V-Mic D3
- Audio-Technica AT4040 Cardioid Condenser Microphone
- Blue Compass Premium Tube-Style Broadcast Boom Arm
- Sirui ET Series Tripod
- White Balance Card
*I am a participant in the Amazon Services LLC Associates Program, an affiliate advertising program designed to provide a means for us to earn fees by linking to to Amazon.com and affiliated sites.